If you’re a new user and planning to start taking bookings right away. Here are the steps you should follow:
Get Started
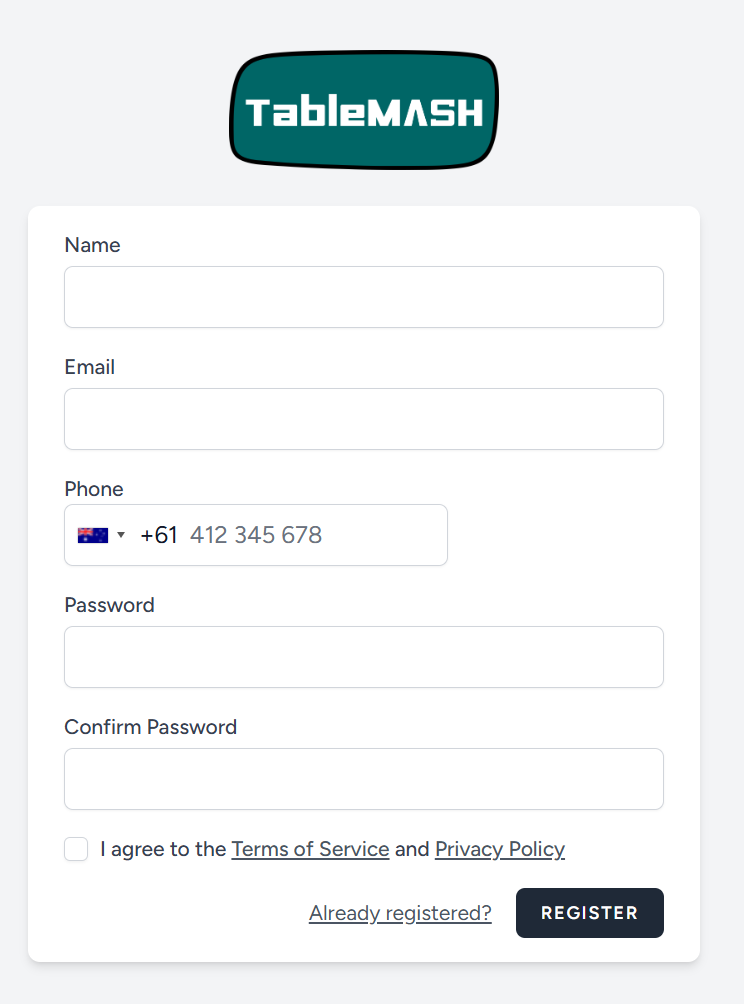
Table Mash is very easy to use and only requires a few simple steps to get started. First, click on the ‘Sign Up’ button and fill in your details, including your name, email address, phone number, and password.
Select the right plan
Once you register and log in, go to the ‘Plan’ section from the side menu, select the appropriate plan for your restaurant, and enter your payment details.

Add Table
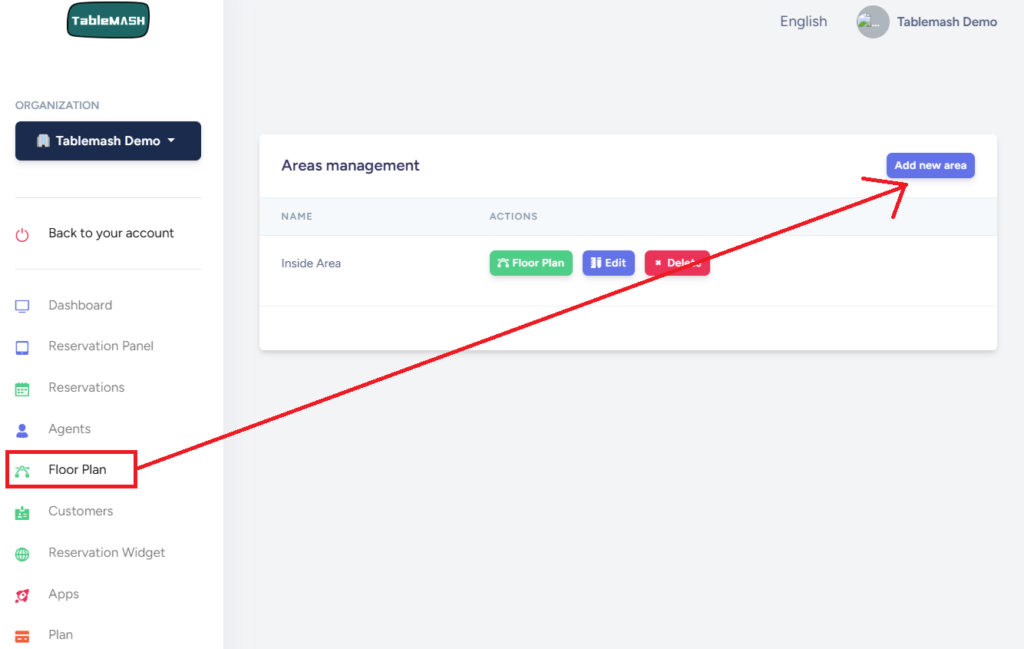
Once you log in, go to the ‘Floor Plan’ section to create your zones and table numbers. Click on ‘Add New Area’ to get started.
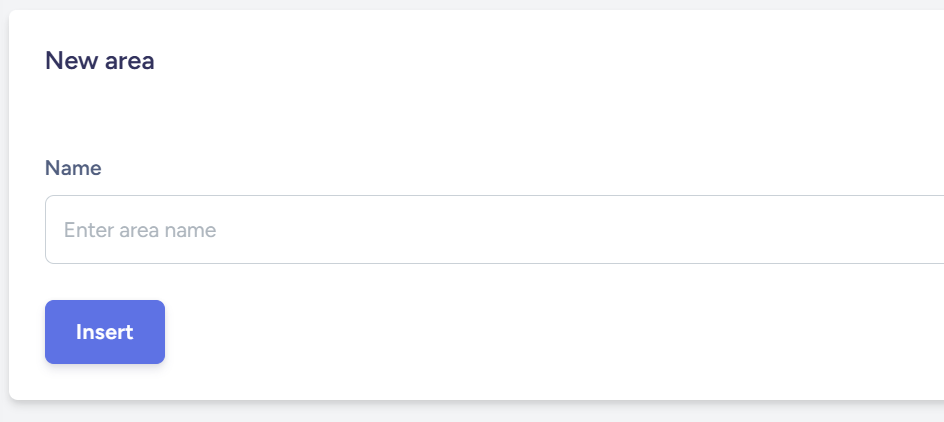
Name the area (e.g., ‘Outside Area’ or ‘Inside Area’) to specify its location, then press ‘Insert’ to save it.
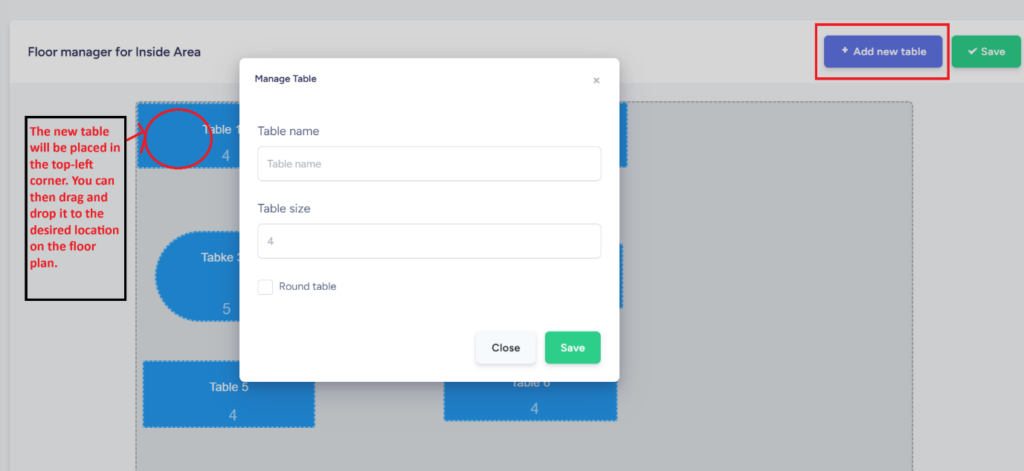
Go to the ‘Floor Plan’ section to add tables to the designated area, just as shown in the image below
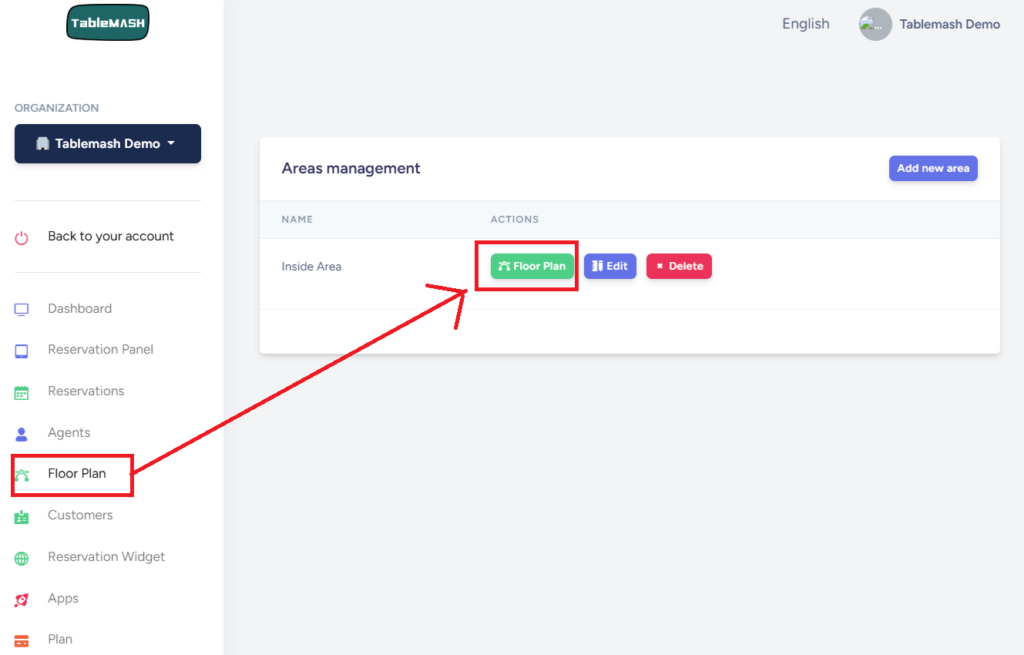
Click on ‘Add New Table’ and fill in the table name, size, and shape. The new table will be placed in the top-left corner. You can then drag and drop it to the desired location on the floor plan.
Add reservation
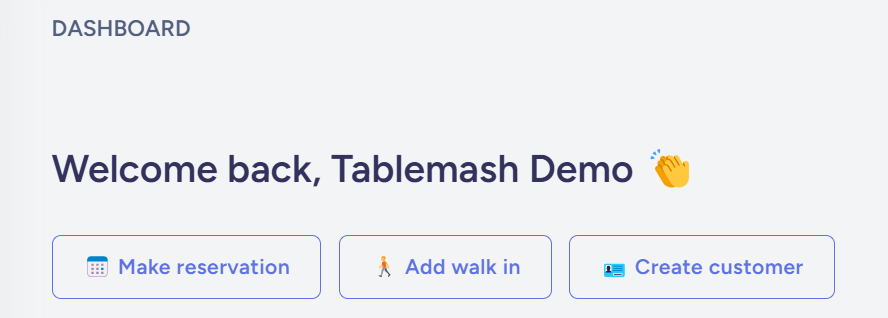
To add a reservation, you can do so from the following options:
- Dashboard
- Reservation Panel
- Reservations
Reservation Panels
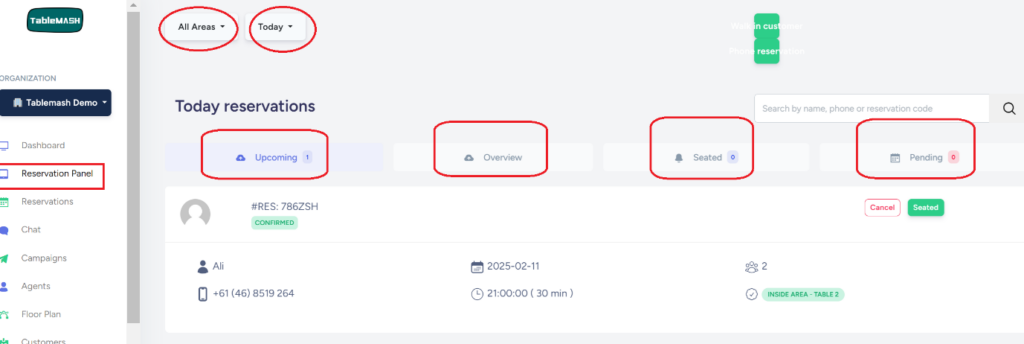
You can overview your booking status such as Upcoming, Overview, Seated or Pending. You can view the floor plan by clicking “Overview”.
Adding a Reservation Widget to Your Website
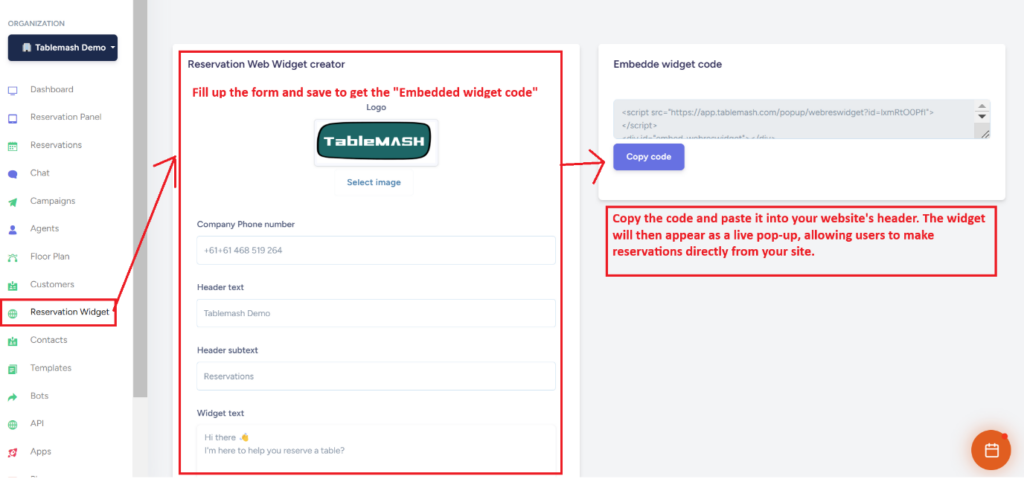
Looking to accept reservations directly on your website? Simply create a widget and copy the two-line code into your website’s header. Once added, the reservation feature will appear as shown below, allowing customers to easily make bookings from your site.
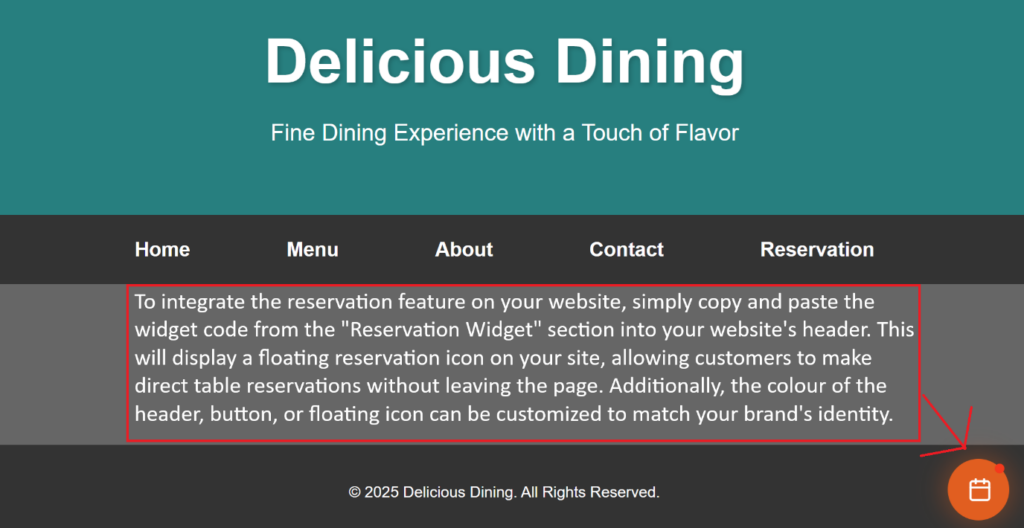
To integrate the reservation feature on your website, simply copy and paste the widget code from the “Reservation Widget” section into your website’s header. This will display a floating reservation icon on your site, allowing customers to make direct table reservations without leaving the page. Additionally, the colour of the header, button, or floating icon can be customized to match your brand’s identity.
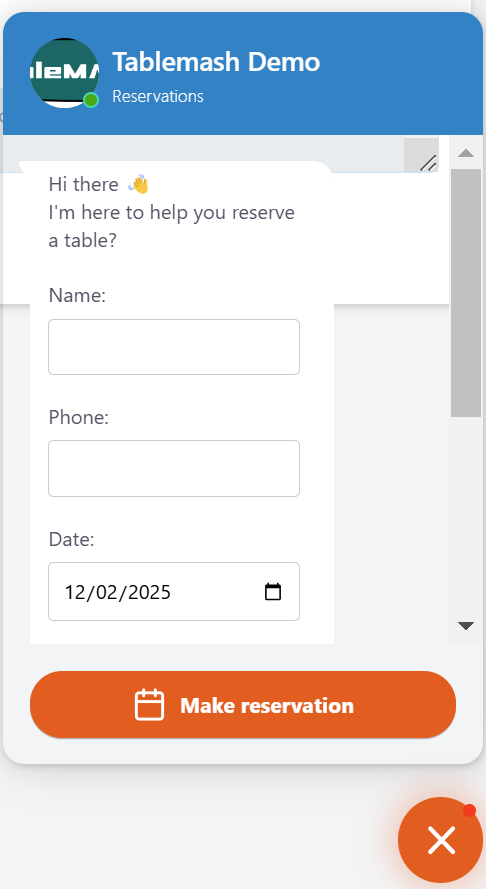
Booking for on website looks like this
Looking to accept reservations directly on your website? Simply create a widget and copy the two-line code into your website’s header. Once added, the reservation feature will appear as shown below, allowing customers to easily make bookings from your site.
Adding staff member as Agent
To add a staff member or management:
Go to the “Agents” section and click on “Add New Agent.” From there, you can easily add new team members or managers to your system.

Adding Customer/Contact
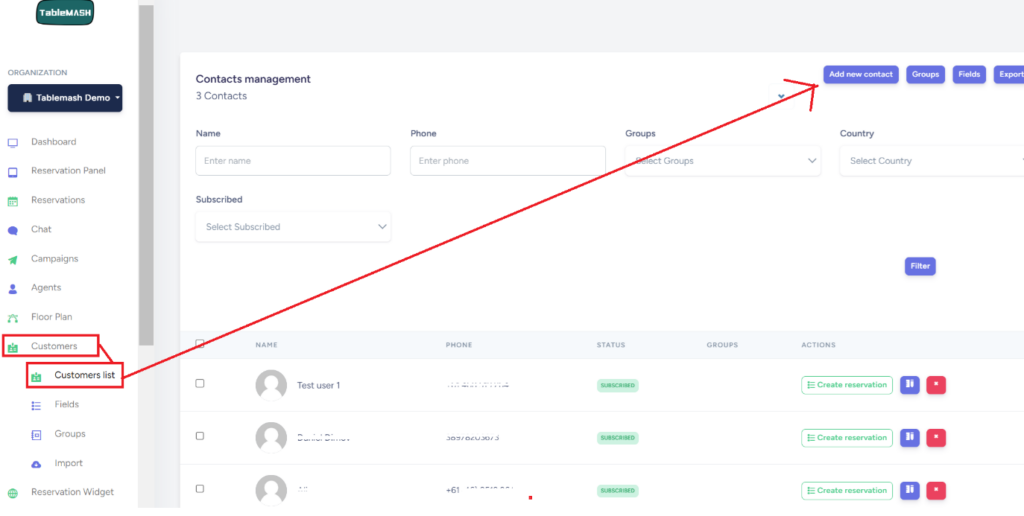
You can add customer details directly into the system. Additionally, information for customers who have made previous bookings will automatically be saved in your system. This allows you to use their details later for sending offers, deals, or future booking reminders
Still looking for help? Contact us
Need Assistant with your account? We can help!
